Tuesday, July 22, 2014

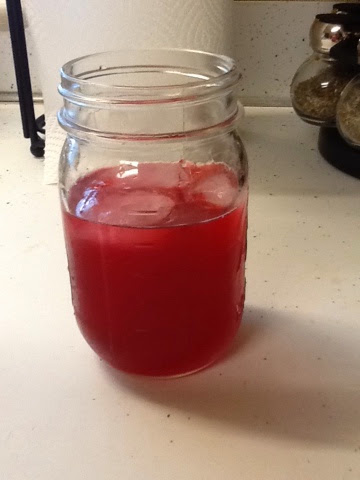
Iced Passion Fruit Tea Lemonade


Once upon a time I went to Starbucks and got their Iced Passion Fruit TeaLemonade and let me say it was the best drink I ever got there! But like most iced Starbucks drinks it was a little too pricey considering the cup was filled to the brim with ice....does that make anyone else mad?! So I went home on Pinterest and found this copycat recipe. I wanted to try it but it was a low sugar option that used sugar alternatives. Call me weird but I like to use plain sugar instead of chemical sugar. I'd rather have a couple extra pounds than be missing a couple extra brain cells cause I am drinking a science project. So I just substituted sugar for it the alternative sweetener. The final result tasted just like the fabulous Starbucks drink, but much more friendly on my budget! 

What you need


Tazo Passion Tea (8 bags) 
Lemonade (I usually go for tropicana but this stuff was all the store had)
Sugar (if you want a low calorie option try stevia) 

So you are going to make the tea concentrate by boiling four cups of water and steeping the eight tea bags. 


Boy does this tea smell GOOD! But be careful cause it very easily stains countertops and wooden spoons (lesson learned) You are gonna want this tea concentrate nice and strong. So just let the tea bags steep for 10 - 15 minutes. 

Next while the tea is still hot add 2/3 of a cup of sugar. 


Mix the sugar till it dissolves. 

Let the mixture cool. 

Once it's cooled down transfer it to a container and let it chill in the fridge. 


Once the concentrate has chilled grab you a glass and get ready to enjoy your yummy treat. 
I usually add a couple ice cubes, fill up the glass 2/3 full with lemonade and top it off with the concentrate. But if you like your less tart then by all means make it however you want to! 


Enjoy!


Monday, July 7, 2014

Homemade Pizza....Yum!


So like any other woman I love cheese and bread! Pizza is my hands down favorite food in the WORLD!!
So many options and varieties and they all involve gooey stringy cheese and yummy fluffy crust! Yes....I have a little bit of a thing for pizza. If it was up to me I would eat pizza every day! My waistline would hate me for it though. So to justify eating more pizza I decided to make homemade pizza! (Thank you Pioneer Woman once more for the recipe!) I figured with homemade I can make it was healthy as I choose.

What you need -

2 cups of flour
3/4 cup of warm water
1 teaspoon of yeast (active dry)
Salt
Sugar
3 tablespoons of Olive oil plus extra for drizzling


So get 3/4 of a cup of warm water (straight from the sink is fine) 
Add the 1 teaspoon of yeast 


Now here is my smarty pants homeschooler discovery! I remember ages ago in science for yeast to grow it needs warmth and something to feed on like sugar. So now I add a little bit plain sugar to my yeasty mixture and it helps the yeast get all bubbly! It almost makes the dough fluffier. 


 Ok thankful moment! My sweet Aunt Lisa got me this super awesome hot pink Kitchen aid stand mixer for a wedding gift and I use it almost daily! Love it!


So add the 2 cups of flour to the mixer. I use the dough hook attachment. (BTW you can totally do this without a mixer! Been there done that and it was still delish!)


Next I sprinkle in some salt


After about 10 minutes your yeast should be ready.


So mix all the wet ingredients into the dry. I usually use mix in the olive oil first.
The mixture should form a nice sticky ball of dough. 
Coat a mixing bowl with olive oil and place the dough ball in the bowl.
I like to heat my oven up a few minutes so the dough will have a cozy house to rise in. Don't forget to turn off your oven when you put the dough in! Been there done that too! I leave the oven door cracked a bit too.


A hour later your dough should be well over doubled in size (guess I forgot a picture of that! oops!)

Preheat your oven to 500 degrees. I know 500 degrees??!! But it works perfectly!

I like to bake my pizza on a stone. Makes it nice and crusty! Drizzle a bit of olive oil on the pan then spread out dough to desired thickness. Now I only used half of the dough for this pizza cause it was just me (hubs was out in the field training so I had "sad eat past my limit" dinner.) So your crust will be much bigger.


Top how ever you want it and toss it in that 500 degree oven for 10 minutes.


So no final result picture because I got too wrapped up in an episode of Downton Abbey and didn't hear my timer beep. *sigh* So be warned, when your oven in 500 degrees five extra minutes can make you lunch very very crispy!

Tuesday, July 1, 2014

Zucchini Lasagna (Low Carb)


Lasagna is a go to comfort food. This is a spin with less carbs because you use slices of zucchini instead of lasagna noodles. It's my first time making it so it's experiment night for dinner!

What you need -

3 Zucchini peeled and sliced thinly
1 pound of turkey meat (you can use beef it you'd like)
1 jar of your favorite pasta sauce (I like Muir Glen Organic Tomato Basil)
15 oz of ricotta cheese
16 oz of shredded mozzarella
1/4 cup of grated parmesan (not that fake powdered stuff)
1 egg
3 cloves of garlic

So drizzle a tiny bit of olive oil in a large skillet and toss in those chopped garlic cloves. Let them simmer for a minute to get that flavor flowing.


After a couple of minutes add the turkey meat and brown it. 


Now here are the herbs I put into the browning meat. 

Pepper
Herbs De Provence (not sure what it is but I like it!)
Oregano 
Parsley 
Basil 
Salt (it's in the owl)


I just shake in a bit of each to the meat as it's browning. 

Next I peel and slice the zucchini. 


Look at all that yumminess! 


Once the meat is browned pour in the jar of pasta sauce and stir it in.


While that simmers mix the cheeses (leave out some of the mozzarella to sprinkle on top) an egg, some salt and pepper and then a shake or so of parsley. 


So before I set out on this expedition I read online that grilling the zucchini a little bit before you bake it will keep the lasagna from getting to watery (and it helped!)


So line the pan with the grilled zucchini. (BTW I made a smaller version since it's just the two of us) 


Layer the meat sauce next. 


Then layer with the cheese mixture.


Keep layering and finish with a zucchini layer.


Top with mozzarella and cover with tinfoil. 
Bake for 45 minutes then uncover and bake 15 more minutes.

TADA!!! And I must say it was very satisfying! Good taste and even the hubs liked it!


Iced Coffee

Once again this recipe is a Pioneer Woman one. But made in a smaller batch and more reasonable size. (The original is a HUGE batch!) Here is the original if you want it.

Here is what you need -
Ground Coffee of your choice 
Water 
A gallon sized container or pitcher
Strainer
Fabric (you can use a cheesecloth or even a bandanna)
Fixin's! I use coffee syrup and milk. You can use stevia, flavored creamers or even condensed milk (YUM!)


So you are going to measure up 1 cup of ground coffee. I'm going decaf this time cause I'm trying to cut caffeine.....it's been agonizing. 

So get the pitcher and coffee. Measure up 1 cup of coffee grounds. (More if you'd like it stronger)
Pour the ground into the pitcher. I have a 1 gallon pitcher. So you'll need 1 gallon of water.


So it'll look like this. I let mine sit overnight so it'll be nice and strong.


So this next step I recommend doing in the sink cause it was the potential to get messy!


So I place my strainer over my pitcher and line it with the fabric. 


Then pour in the mixture. Just make sure you don't get grounds in the finished product....it's gross!


So after straining you have a the ability to make a wonder iced coffee! (Helps with saving money too! No more having to pay 2-4 dollars for a cup of iced coffee!)


Now lets make a glass!


First you need ice. Hence the name ICED coffee! I fill my glass a little over halfway with the coffee.


Then top it off with milk.


Here is the sweetener I use. Just a splash is plenty for me. But make it how you want.


Last but not least enjoy!


Monday, June 30, 2014

Abbi's Butterfinger Pie


My sister-in-law has a wonderfully simple and delicious Butterfinger pie! 
I am not a super fan of peanut butter but this stuff is legit!

What you need - 

One 8 oz block of Cream Cheese
12 0z of Cool Whip
6 Butterfinger Candy Bars
1 Pre-made Pie Crust


Make sure the cream cheese is softened and mix together 8 oz of the Cool Whip. Mix in 5 crushed candy bars. Now put the mixture in the pie crust. Then top with remaining cool whip and crush that last candy bar and sprinkle it on top. Let is chill for a few hours and serve up this divine creation! Thanks Abbi for recipe! 

Saturday, June 28, 2014

How to Clean Microfiber

     First thing first, God is awesome! Being a newlywed couple money is tight and we are trying to build up our savings. So we usually just don't go out and make big purchases. A few months ago I was telling my husband that I one day I wanted to get a rocking chair, at least before we have a baby. But I knew we didn't need to go out and buy one. I was just thinking out loud. Well not two days later a friend from church messaged me on Facebook asking if I would want a glider rocking chair! I know! Wow! Talk about awesome timing! I messaged her back telling her that I was just saying how I wanted a rocking chair and knew we wouldn't be in a place to buy one quite yet. So when he husband bought it to church i was excited to see it was in great shape and had an ottoman too! This couple had adopted their precious daughter a year or so ago so there were some stains on the ottoman which is to be expected when there is a toddler in the house. Even since we've had it my niece got a blueberry stain on it. 

So i figured a little resolve and it'd be good to go. Not the case. I figured I would just make a slip-cover for it and call it that. But of course life got crazy and I didn't have time to pull out my sewing machine. Well I saw on Pinterest a tutorial on how to clean microfiber so I figured I would give it a whirl.

What you need -
Spray bottle
Rubbing alcohol 
Neutral colored sponge
Clean scrub brush (optional) 


So here are the before pictures...I know it looks pretty rough! 


Bleh


So you are going start by spraying down the area you want to clean. (I just started in one corner and worked my way around) Now don't be skimpy with the spraying. You want it pretty wet, the alcohol will evaporate so it's not a big deal. Now grab your sponge and just start rubbing away. Yep that's really just it. My stains were pretty set in so it took some serious elbow grease. But after about 8-10 minutes my once filthy ottoman looks almost brand new! 


Pretty neat-o! The ring along the edges in the pic above is just from where it was still kinda wet. It dried right away. If you want to grab that scrub brush and re"fluff" the fabric. 


Bam! So almost all the stains came out except for the previously mentioned blueberry stain. Thank's Paisley pop! But hey everytime I see that little purple spot I think of my sweet silly neice! 

So that is it. As I write this up let me just toss a shout out for my favorite BBC period drama EVER!! North and South! It's wonderful and I totally recomend watching it! 

Friday, June 27, 2014

Homemade Laundry Detergent - Concentrate

So here's the deal! Laundry detergent is expensive! And it's one of those things you kinda need to live a non-filthy life. So a 100 oz bottle of tide it about $10. Well all the ingredients you need to buy to make homemade laundry soap add up to about $10-15 dollars and you get to make several batches from it. 

  • Borax Powder $4 dollars 
  • Washing Soda (NOT BAKING!) $3
  • Fels Naptha Soap (I used to use Ivory then I switched) $1 per bar and this recipe calls for 2
  • Dawn Liquid Dish Soap $2 (I bought that smallest bottle because I only use it for laundry soap) 
(This stuff usually can go for about 150 loads. All depending on how much you use per load.)

So let's math this up! Drumroll please!! 11 dollars! Now this stuff will last making a couple batches. The only thing I have to buy every time is the bars of soap. I usually don't make the concentrate but 2-3 times a year because you don't need as much and I usually just use it for my husbands ACUs (fancy acronym for military uniforms) Any person who does a soldier's laundry knows how terrible they can smell! Especially after some time out in the field doing training...bleh! So this stuff kicks butt! I'd like febreeze to make a commercial and spray down some dude's military garb and tell me how it works for them (not well)

 So let's start with measurements! 
Here is what you need and how much 
  • 2 Fels Naptha bars of soap (if you use a bath soap...it's totally ok...use 3 bars)
  • 2 cups of Borax Powder
  • 2 cups of Washing Soda....once again NOT BAKING SODA!
  • 1/2 cup of plain original blue Dawn dish soap (helps with grease fighting!) 
  • 6 cups of hot water

Kitchen tools you are going to need

  • Cheese grater 
  • Mixing bowls are pretty handy
  • Whisk
  • Blender of some sorts. I'm using my immersion blender
  • A big-ish pot
  • Containers for the final product (I use mason jars cause they're so freaking cute!)
  • Some good music of course....I usually go with Drew Holcomb and the Neighbors, Hillsong United or Disney Princess Music. I regret nothing.

So first you are gonna grab yo handy dandy cheese grater and get to work on those bars of soap! 


My mom has an old salad shooter from ages ago and I used to use that. But alas when you get married and move out on your own you don't always have access to your mom's super cool kitchen gadgets. So grate both bars and don't get those knuckles! 


So put all that soap in your pot on the stove. Everytime I make laundry soap I desperately want to prank someone with this soap! It looks like grated up cheddar cheese and I just have to urge to toss it on someone's bowl of chilli! I mean what's the worst that could happen from someone eating soap.....oh....right


So I suppose soap pranking is out of the question. So next measure up 6 cups of warm water straight from the old tap


You're going to set the heat on the stage somewhere between the lands of low and medium. You are going to cook/melt the soap shavings but do NOT let it boil. It'll make a big old mess and give you nasty little burnt chunks of soap. After a bit it'll look like the picture below.


Keep on cooking that stuff! By now your kitchen will give off the illusioned aroma of a freshly scrubbed house! While the soap is cooking away and melting down even more I am going to measure up the powdered ingredients. 


Two cups of  each Borax and Washing Soda. I usually grab my whisk and break up the larger chunks so it'll dissolve smoother.


Next take your wisk to the pot and whisk it around to break up any chunks of soap and get the layer of soap off the bottom of the pot. (Random note after this your pot will be REALLY clean!)


Once all the chunks of soap are dissolved you are going to add the dry ingredients. 


Whisk it all together and let it dissolve. It's really going to thicken up and it's ok if it's gritty. Just cook it down as smooth as you can.


Once it's dissolved it'll look kinda frothy. 


Next pour in the dish detergent. Mix it in well.


So I have everything ready to pour into the jars. Thank goodness for the funnel! 


And it all perfectly fit in three 1 liter mason jars! Make sure there is a bit of room, don't fill the jars 100% to the top.


Now you are going to let the jars set overnight or for about 8 hours. This is what it'll look like.


This is my least favorite part of the whole process. But with a little patience you can do it! My motivator is that I'm saving money and stretching a dollar out more. God provides us with means of living and I want to do my best and be frugal with what we are blessed with. So this is one area I can really save some money.


So you are going to break up the top layer of the detergent. It'll be pretty thick and hardened up. So just chisel it out with a spoon and dump the liquid on the bottom of the jar in too. I did all three jars at once.

This next step takes a bit of elbow grease. If you don't have an immersion blender a normal blender will work fine. (Side note of how cool God works! I looked at Kohl's and Wal-Mart one friday evening at immersion blenders and the cheapest I could find was $35. So I figured I would wait until maybe I found one on sale or had a coupon. Literally the next day Justin and I went yard sale-ing and I found this one with 3 different attachments for $5!! God is good even in the smallest things!)

So yes, grab ye olde immersion blender and about 1/2 - 2/3 of a cup of water. Pour the water over the mixture and start blending/mixing. Add more water as needed. It should have the consistency as frosting.


After about 10 minutes of mixing, blending up the large chunks, and adding a bit of water here and there it's all done! It's nice, smooth and fluffy. 


See?? It looks like frosting! Don't try and eat it though....probably taste pretty gross!


Haha! So I feel I should keep it honest! So here is what my poor counter looked like! Pretty messy! But the wonderful thing is if you make a mess it's soap! This is probably the easiest mess you'll ever have to clean up! I ended up with some splattered all over my dress so when I was done I just tossed it in the wash! TaDAAA!


I don't like spooning it in cause I feel I make a big mess. So I just filled up a ziploc bag, snipped off the bottom corner and piped it in the jars like I was frosting a cake. I keep mentioning frosting....now I want to eat some frosting...


So alas your hard work is done! The wonderful part about this recipe is that you only need a spoonful per load. For J's uniforms I use two though...just cause they are extra stinky!